How to Make Chocolate Balloon Bowls
My 14-year-old son and I have decided to make some of the Internet’s most popular recipes and party ideas this summer to see if they’re really as good, fun, and delicious as they seem.
Our first party project was chocolate balloon bowls. We both thought these would be great for cousin’s camp next month, but also agree that they would make a great DIY for a birthday party. At first, we weren’t as successful as we hoped, and definitely decided that the online photos make this look much easier than it is. But! We toyed with our choice of chocolate, tried a few different sets of balloons, and discovered that non-stick spray is definitely a secret to chocolate balloon bowl success. Our tests also helped to determine the best balloons for the project, not to mention which chocolate set well and was easiest to work with. Here’s a look at how we made them, and the steps needed to guarantee a favourable outcome:
- You can use any balloon for this project, but we found water balloons to be the perfect size. Just be prepared to deplete all the air in your lungs when blowing them up—it’s no easy task. If you use regular sized balloons you’ll likely only want to blow them up half way, otherwise your chocolate bowl will be ginormous.
- Once balloons are inflated, wash them with soapy water and allow to air dry before beginning the project.
- Lightly (very lightly!) spray each balloon with non-stick spray before dipping it into the chocolate.
- Melt chocolate in the microwave or on the stovetop using the double broiler method. In my opinion, the best chocolate for this project is the candy coating kind (also known as Candy Melts). You can also use semi-sweet or white chocolate, if desired, but in our tests the Candy Melts worked best.
- Let the chocolate cool slightly before using. Cover a large baking sheet with wax or parchment paper.
- Spoon a small amount of the melted chocolate onto the baking sheet. This will become the base of the bowl.
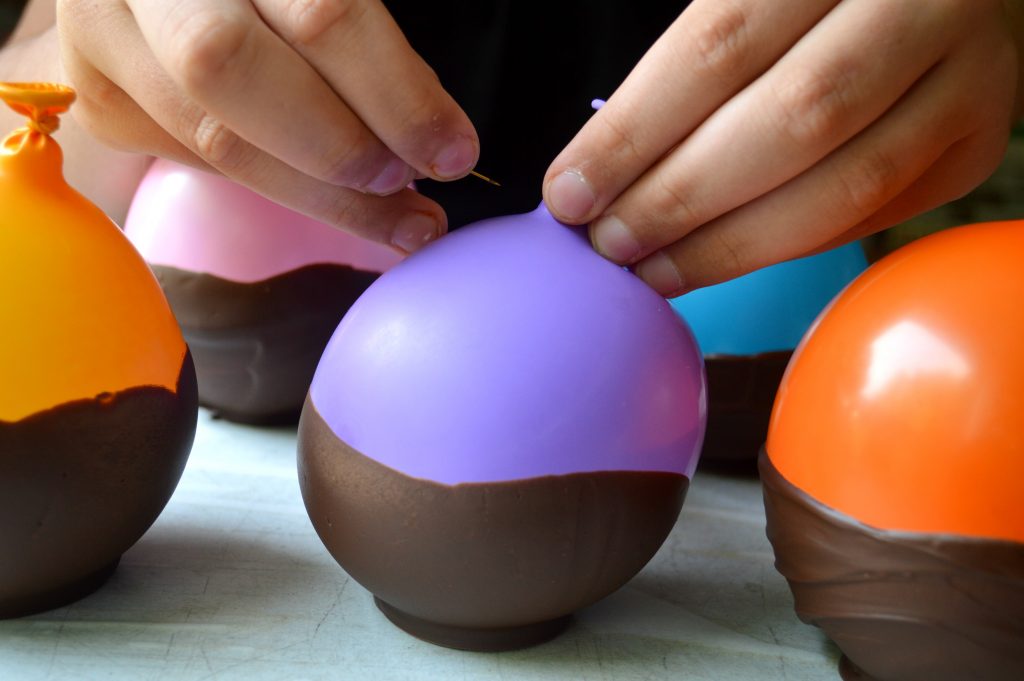
- Take a prepared balloon and dip the bottom of it into the chocolate, inserting it far enough to create a bowl shape around the balloon. Remove and gently place in the centre of the chocolate spooned onto the baking sheet.
- Repeat until you’ve made the desired number of balloons.
- Place the baking tray in the refrigerator to speed up the chilling process, especially if it’s a very warm day. Otherwise the chocolate might not firm up as much as you like.
- Pop the balloons with a pin and slowly let them deflate inside the chocolate bowls.
- Carefully remove the balloon bits from inside the cups and fill them with whatever fillings you like (we like pudding and whipped cream, but ice cream works well, too).
Have you tried making chocolate balloon bowls before? How did it work out for you?


