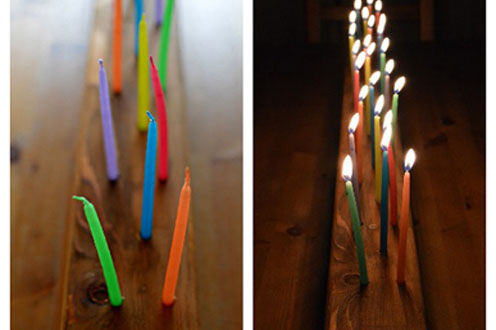
DIY Birthday Candelabra

I’ve spent the past five weekends working (not to mention all of the Mondays to Fridays that fell between each of those weekends!). I’ve been putting the finishing touches and words into a massive work project and every spare second of my free time has been immersed in this undertaking. Last Saturday, I finally decided I needed a break, and when procrastination meets Pinterest, it’s amazing what you can create. Enter my new birthday candelabra.
The original version of this candleholder was 10 feet long. I clearly didn’t need something so huge for my own table, but I thought a 3 foot version would be great for birthdays and dinner parties. My husband was in charge of finding me a piece of wood that 4’ x 4’ x 3’ and he came through in less than an hour. We sanded the sides for a smooth finish, drilled 24 holes down the length of one side, staggering them evenly over the space, and swiped some quick-drying stain over the surface. I placed the 5’ coloured taper candles inside the holes, and within 2 hours of starting our project we were finished.

My son had a sleepover birthday party later than night and the candelabra was a hit. All of the kids took turns blowing out the candles and it was a new way to decorate our space for a birthday. I won’t hesitate to use white or gold candles for other occasions, or pink and red ones for Valentine’s Day, but I like the idea of pulling this out when it’s a birthday week in our house and using it to decorate the table.


