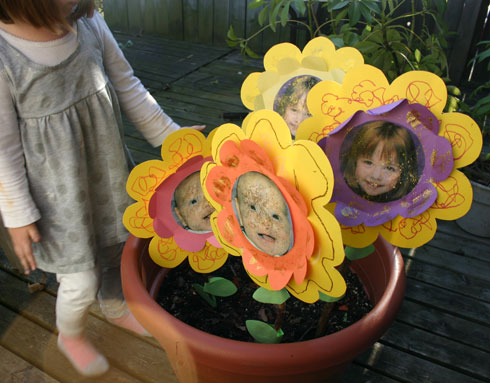
Photo Flower Bouquet
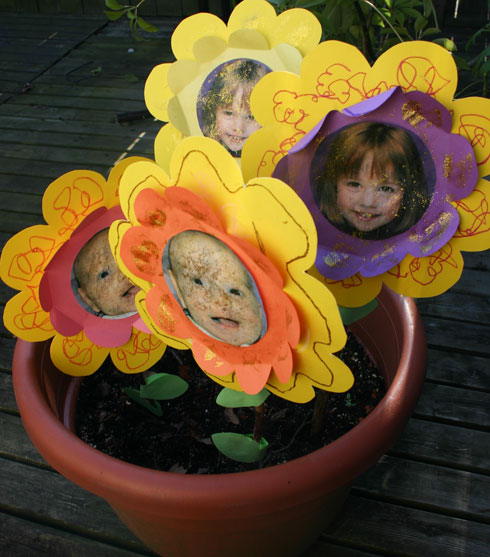
This simple spring craft makes for a sweet gift to give to family members.
You’ll Need:
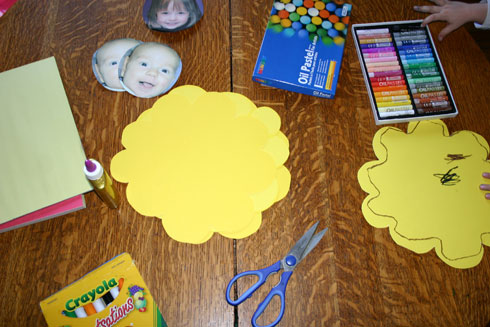
- Yellow (or pastel) poster board
- Coloured construction paper
- Glue stick
- Glitter
- Scissors
- Crayons/markers
- Print outs (or photos) of your child’s face cut in a circle
- Sturdy twigs from outside
- Tape
How to Make
- Cut out large flower shapes using the poster board (as many flowers as you have photos of the kids). Make sure the flowers are larger than the photos.
- Cut out a similar flower shape in a contrasting colour of construction paper. These should be smaller than the poster board flowers, but larger than the photos.
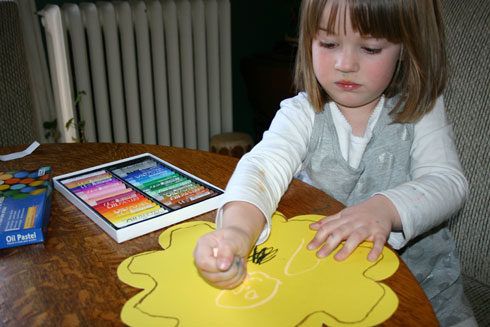
- Let the kids add their own colour to the larger (and smaller) flowers using markers or crayons.
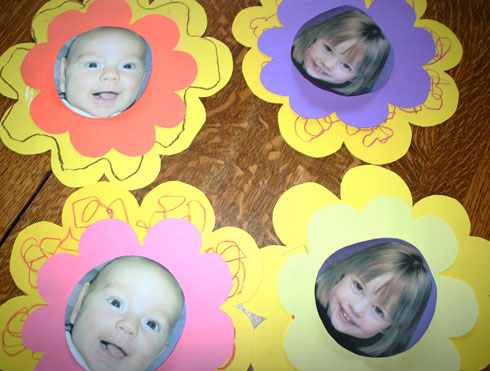
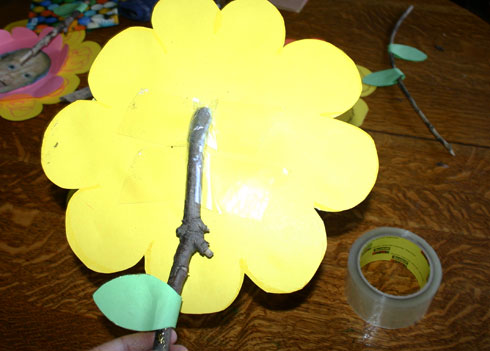
- Glue the centre of a construction paper flower to the centre of a yellow flower, making sure that the ‘petal’ part of the construction paper flower is not glued on.
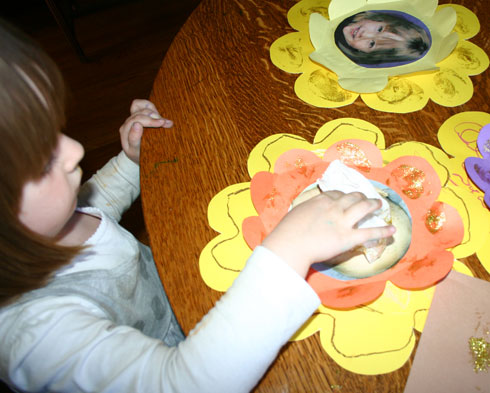
- Glue the pictures of the kids to the middle of the flower. If you choose, get some white glue and mix with glitter. Using a small sponge or a damp piece of paper towel, dab into the glitter glue and then stamp it onto the flower and photo. Let the flowers dry.
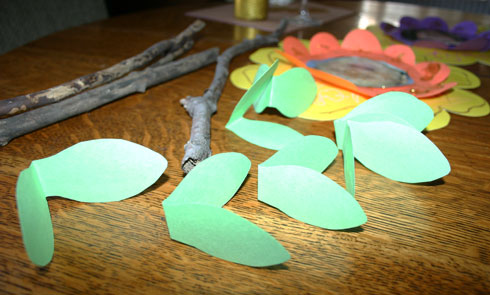
- Fold a sheet of green construction paper in half length-wise and cut out leaf shapes so that the bottom of the leaf is along the fold (see image).
- Wrap leaves around the twigs. Glue the leaves together in the middle. Let the ‘stems’ dry.
- When both are ready, tape the twig to the back of the flower then fold over the construction paper petals to give it a 3D appearance.
- Place the ‘stems’ into a pot of earth and present as a spring or Easter bouquet.