DIY Rainbow Smocks

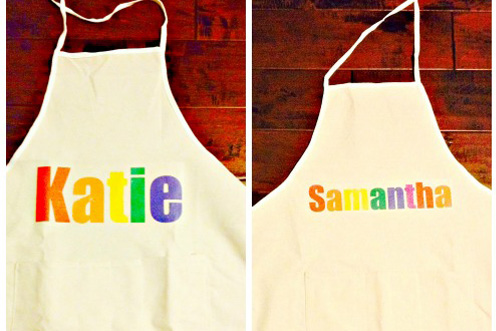
My sister recently threw a ‘rainbow art party’ for my four-year-old niece, and while I thought the entire celebration was as cute as it was colourful, it was the artist smocks she made for the kids that I felt were a highlight and worthy of sharing.
This project costs only $3 per smock and doubles as the loot bag item, making it both practical and cost effective. They’d also make a mighty fine March Break craft for your favourite little people. Once finished, it can be used to protect children’s clothing while they are painting, crafting, cooking or baking.
Here’s how to make them:
Purchase the canvas artist smocks from the dollar store. They are located in the regular craft supply section of the store, not the kiddie craft department, as technically they are meant for adults (but I made one for my two year old, and while it was long it still fit). Use a program on your computer like Microsoft Word or Paint and pick the size and style of font you want. Type a name and choose a colour for each letter. Then flip the work horizontally—this is essential! If you don’t, the project won’t work. If your program doesn’t allow you to flip the work (Microsoft Paint definitely has this as an option), check your printer settings to see if it’s available there. Once the work has been flipped, print each name onto a piece of iron-on transfer paper and iron them on to the aprons.
So, there you go. Sounds easy enough, don’t you think? They were definitely a hit with the kids—and parents—at the party, and I think it’s a project almost anyone can take on, including older kids, who may just need a bit of assistance with the ironing.


